One Hour Per Selfie Assignment:
Description: The point of this assignment is to teach you how to block in large shapes, find values, and mix simple clean / flesh colors fast. It also teaches you about color theory because the backgrounds are all different intense acrylic colors. The background will affect what colors to use on the portrait. I call that air. Remember in the classical world that drawing first, value second, and color third. I recommend you buy the book Portrait From Life in 29 Steps by John Howard Sanden with Elizabeth Sanden.
Instructions:
1. You will receive a pad of Strathmore 300 Series 140lb watercolor paper pad 9"x12". Tape 12 sheets of watercolor paper onto the hard board or the white wall using masking tape. Stay away from the dark gray wall in class.
2. Gesso the ___ sheets each once and let it dry. Sand it just a little bit so you don't ruin your brushes.
3. Use acrylic paint as an underpainting for the background: paint 2 in red, 2 in yellow, 2 in blue, 3 in green, and 3 in orange and let it dry.
4. Print out enough different selfies of yourself to pass out to your peers. Go to the library on the third floor or the BAS (business) building to print out your color laser prints. Make sure your face takes up 2/3 of the picture. The better the picture and lighting the better the painting will be. Stay away from flash photos because they wash out the details and depth on the face.
5. Put carbon paper underneath self-portrait photo and now trace large shapes with pen.
6. Set up your 11"x14" palette with just these colors: starting on the left side you should have cadmium yellow light, cadmium red light on the left corner, on top phthalo blue and burnt sienna. On the bottom middle of your palette you will have titanium white. No liquin or Terpenoid!
7. Mix flesh colors. Simple flesh color is cadmium a little red light + a little cadmium yellow light + a lot of titanium white. Remember to start out with titanium white and add color.
8. Now block in the your values starting with the dark values (shadow), middle value, and then the lights. Think of separating the shapes, don't merge them together. They are like puzzle pieces. Don't blend the edges of each shape. You may leave most of the background the bright acrylic paint.
9. Once our hour is up, stop and clean our brush. Now take vegetable oil and paper towel (Bounty) and wipe off as much oil paint as possible. Next clean with dish soap (Dawn Soap). Lastly, brush your paintbrush across ivory soap to make sure it is fully clean. This the the non-toxic way of cleaning your brushes.
Material: A Pad of Strathmore 300 Series 140lb watercolor paper pad 9"x12", making tape, hardboard, gesso, acrylic paint, palette knife, a #6 and #1 natural hair filbert brush, 11"x14" glass palette, oil paint (white, cadmium yellow light, cadmium red light, Phthalo blue, Burnt Sienna), carbon paper, vegetable oil, dish soap, ivory soap and paper towel.
Grade: ____ points total (Depends on how many students in class)
**look at the examples and you-tube video for what to bring to class to class the first day, how to set up your palette, and clean your brushes.
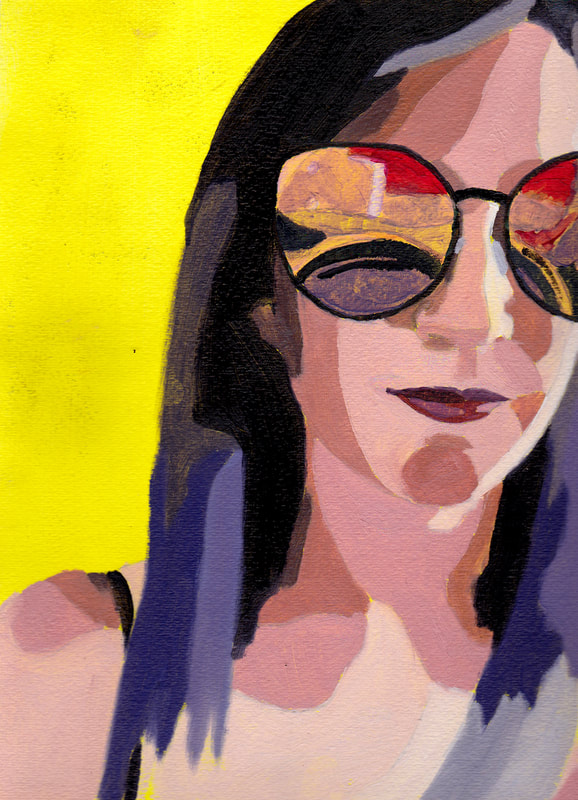
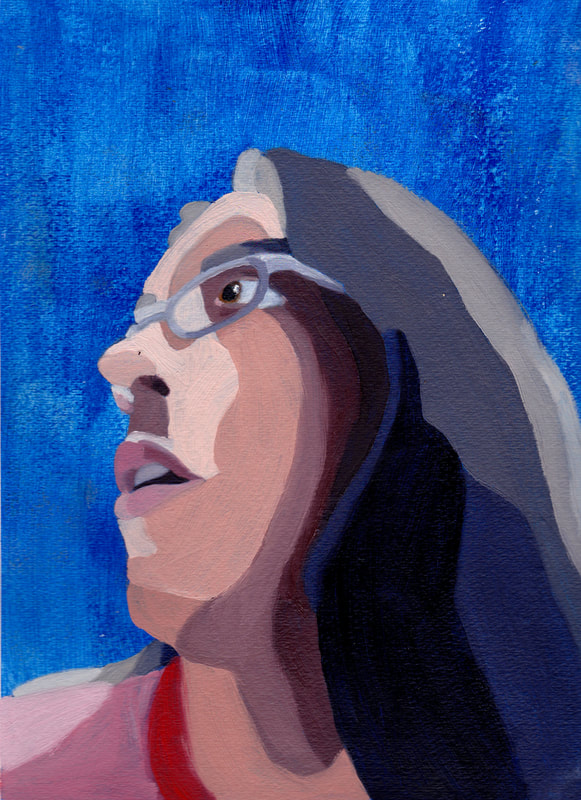
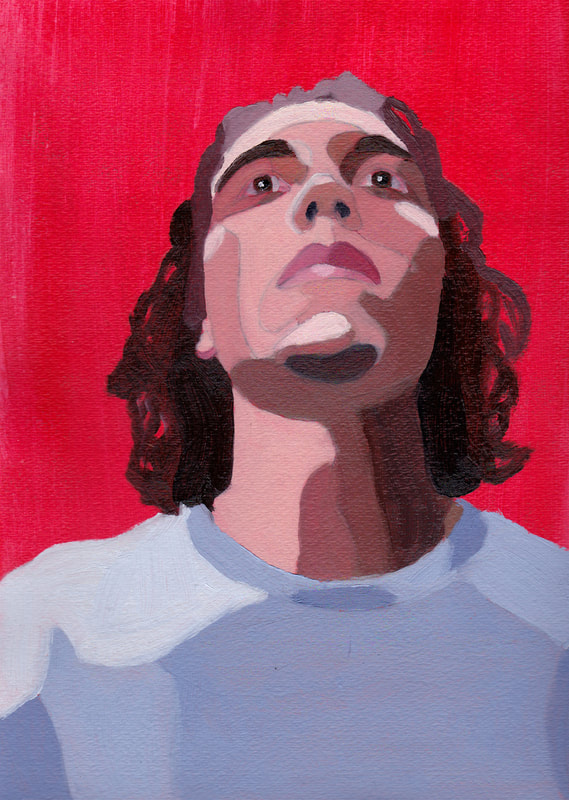
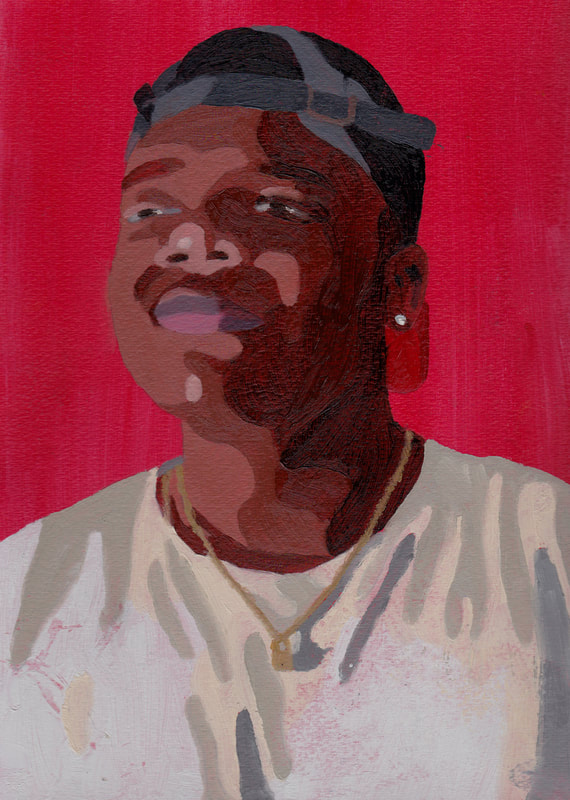
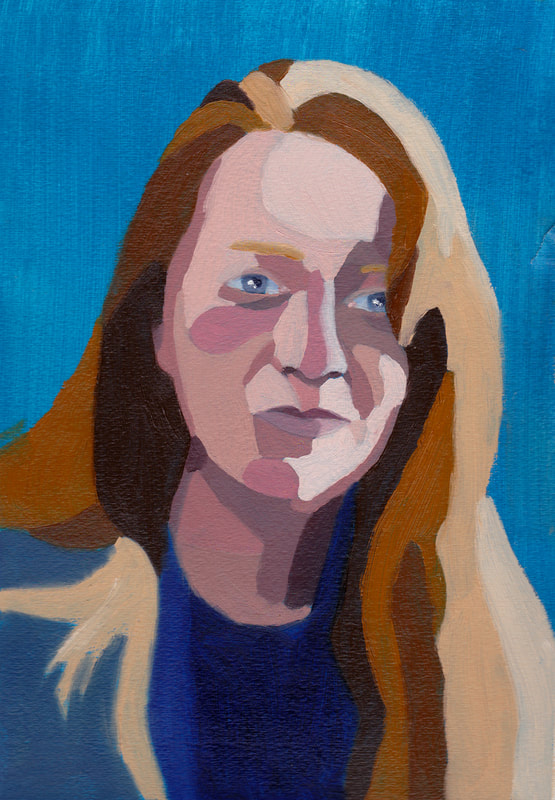
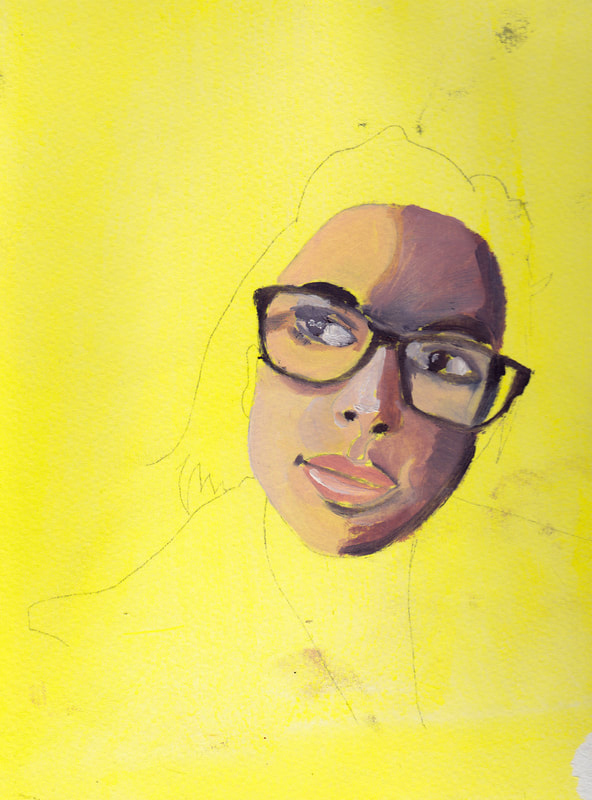
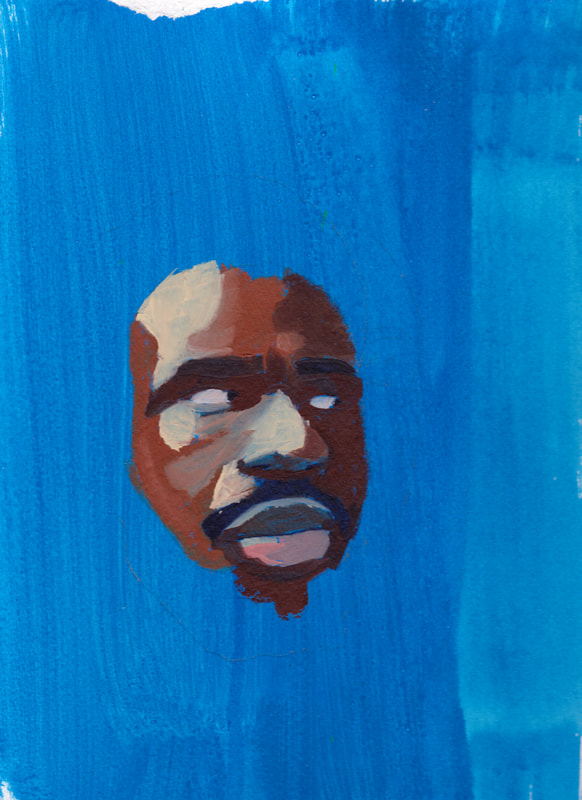
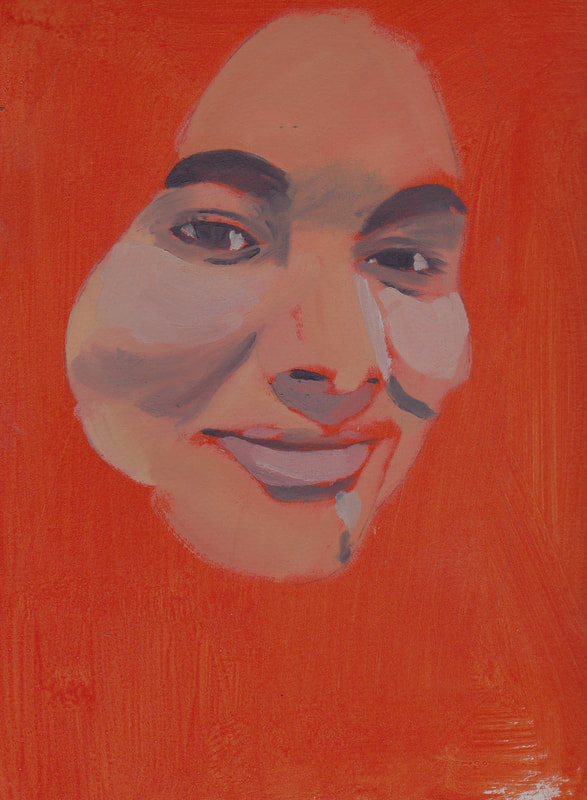
Good and Bad Student Selfie Examples below:
Description: The point of this assignment is to teach you how to block in large shapes, find values, and mix simple clean / flesh colors fast. It also teaches you about color theory because the backgrounds are all different intense acrylic colors. The background will affect what colors to use on the portrait. I call that air. Remember in the classical world that drawing first, value second, and color third. I recommend you buy the book Portrait From Life in 29 Steps by John Howard Sanden with Elizabeth Sanden.
Instructions:
1. You will receive a pad of Strathmore 300 Series 140lb watercolor paper pad 9"x12". Tape 12 sheets of watercolor paper onto the hard board or the white wall using masking tape. Stay away from the dark gray wall in class.
2. Gesso the ___ sheets each once and let it dry. Sand it just a little bit so you don't ruin your brushes.
3. Use acrylic paint as an underpainting for the background: paint 2 in red, 2 in yellow, 2 in blue, 3 in green, and 3 in orange and let it dry.
4. Print out enough different selfies of yourself to pass out to your peers. Go to the library on the third floor or the BAS (business) building to print out your color laser prints. Make sure your face takes up 2/3 of the picture. The better the picture and lighting the better the painting will be. Stay away from flash photos because they wash out the details and depth on the face.
5. Put carbon paper underneath self-portrait photo and now trace large shapes with pen.
6. Set up your 11"x14" palette with just these colors: starting on the left side you should have cadmium yellow light, cadmium red light on the left corner, on top phthalo blue and burnt sienna. On the bottom middle of your palette you will have titanium white. No liquin or Terpenoid!
7. Mix flesh colors. Simple flesh color is cadmium a little red light + a little cadmium yellow light + a lot of titanium white. Remember to start out with titanium white and add color.
8. Now block in the your values starting with the dark values (shadow), middle value, and then the lights. Think of separating the shapes, don't merge them together. They are like puzzle pieces. Don't blend the edges of each shape. You may leave most of the background the bright acrylic paint.
9. Once our hour is up, stop and clean our brush. Now take vegetable oil and paper towel (Bounty) and wipe off as much oil paint as possible. Next clean with dish soap (Dawn Soap). Lastly, brush your paintbrush across ivory soap to make sure it is fully clean. This the the non-toxic way of cleaning your brushes.
Material: A Pad of Strathmore 300 Series 140lb watercolor paper pad 9"x12", making tape, hardboard, gesso, acrylic paint, palette knife, a #6 and #1 natural hair filbert brush, 11"x14" glass palette, oil paint (white, cadmium yellow light, cadmium red light, Phthalo blue, Burnt Sienna), carbon paper, vegetable oil, dish soap, ivory soap and paper towel.
Grade: ____ points total (Depends on how many students in class)
**look at the examples and you-tube video for what to bring to class to class the first day, how to set up your palette, and clean your brushes.
Good and Bad Student Selfie Examples below: